I love to fill my spare time with gardening, cooking and travelling, which I hope to share with you! A great day to me is exploring somewhere new and capturing fantastic memories or being at home pottering in my garden and picking fresh ingredients ready to whip up a new culinary creation!
Me on our first day in Kefalonia! Take me back – please!
Unfortunately it has been awhile since my last blog post on here. In the midst of going on holiday for a week (which now feels like a distant memory), starting a new job (I’ve now been here a month) and moving house, the blog just had to take a back seat for a while! However I am itching to get the blog up and running again as with a house move comes a new garden to develop and exciting challenges.
A few Wild Strawberries we inherited in our old garden!
My Partner has asked me to reign it in slightly with this garden as we are hoping to buy in the future, so we will be moving again! I was a bit over ambitious with what I wanted to take with me on the last move and with lots of things already planted tensions were a little fraught! I have as always completely listened to my partner, and due to this already have a long list of seeds I want to plant and what I’d love to do with the garden! However I have vowed to myself that I am going to have to come up with fun and new ways of having a lovely garden but one that is easily moveable without all being in pots (any ideas are more than welcome)!
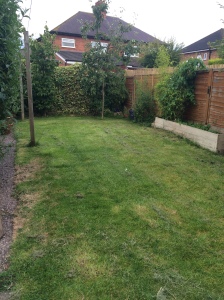
The new garden from the patio doors
So I wanted to share my adventures with you as I start to create a new garden that is not only pretty but also provides us with tasty vegetables and fruit! I’ve already done a bit of work in the garden (we’ve only been here 2 weeks so far!) but there’s lots to do and also lots of planning for next year! I also live not far away from some lovely allotments, which I have applied for a plot on one, however I’m not holding my breath that I will get one anytime soon! Wouldn’t that be lovely though if it did happen? I don’t know if anyone else does this but I had a walk past one of the allotment sites the other day, scouting out which plots I felt weren’t used, there seems to be a few, but after being told I was on a waiting list obviously the organisers don’t see the same things I do! I’m keeping everything crossed that I get a call or an email!
A closer view of the garden before we moved in!
Anyway here’s to the future! I hope you find the posts exciting and join me for this journey, which will be filled with things I’m growing and recipes using the produce I’ve grown or other ways I have used plants from my garden. I will also be posting up places that I have been to, which have given me inspiration or tantalised my taste buds, as we all need some fresh ideas and some time off from cooking!
I love this time of year, the sun is shining (Ok maybe it has taken a little break where I am today), the birds are singing and everyone just seems that little bit happier! On an evening walk a couple of weeks ago I saw the familiar but beautiful site of Elderflower bushes lining the path. Since then I have spotted them everywhere and it feels like they are in abundance this year! Last year I was a little bit too late to make anything with Elderflowers, so as soon as I saw the beautiful bunches of Elderflowers I knew I had to act fast.
Elderflowers freshly picked!
Basket in hand I returned after a sunny and dry day (apparently the best time to pick Elderflowers) and selected the biggest and best bunches I could find. I absolutely loved collecting the Elderflowers and found it so therapeutic! Once my basket was almost full and the dogs were exhausted from their energetic walk, I returned home to set about making my very first Elderflower Cordial!
The start of something special…
I have to say I really enjoyed making this cordial, it is long winded in the sense it has to steep over night (this is no 30 minute recipe) but there is so much pleasure in creating something so rustic and homemade. I was like a child on Christmas day morning though, as I couldn’t resist peeping under the tea towel to check on the cordial at far too many intervals! As it was Father’s Day the weekend I made the cordial I gave a bottle of cordial to my mum and dad (so far it has been a success) and we ourselves kept a bottle. I would say this recipe makes two 1 litre bottles with enough left over for a smaller bottle, so plenty to enjoy over Summer!
Elderflower Cordial
30 heads of Elderflower
1.8 kg granulated sugar/caster sugar
1.2 litres water
2 lemons (freshest you can get)
50 g citric acid
As you can imagine being out in the hedgerows and being so pretty the Elderflowers attract a lot of insects. Before you start making the cordial lightly shake the Elderflowers off outside to get rid of any insects. Then place them in a large bowl (I used my Kenwood mixing bowl) and place to one side.
Grate the lemon zest and slice the two lemons thinly, once done add the zest and slices to the bowl with the Elderflowers.
Next to make the syrup place the sugar and water into a pan and place on a medium to low heat, bringing it to the boil. Stir the syrup solution until the sugar has dissolved.
Once the sugar has dissolved pour the boiling syrup onto the Elderflowers and lemons in the bowl. Stir in the Citric Acid and then cover with a clean tea towel. The mixture will need to steep for at least 24 hours (I left mine for 36 hours) at room temperature.
When the mixture is ready line a sieve with muslin to pass the cordial through. If you don’t have any muslin (like me) line a colander with a clean tea towel (I used the one that had covered the cordial) and place this over a wide enough bowl. Pour the mixture through the colander/sieve until all the mixture has passed through. Then ladle the mixture into your prepared and sterilized bottles. Attach the lid firmly and store somewhere safe.
Elderflower Cordial all bottled up and ready for drinking!
Quite simply it is Summer in a glass! Please do let me know if you make this recipe, I’d love to hear how you get on!
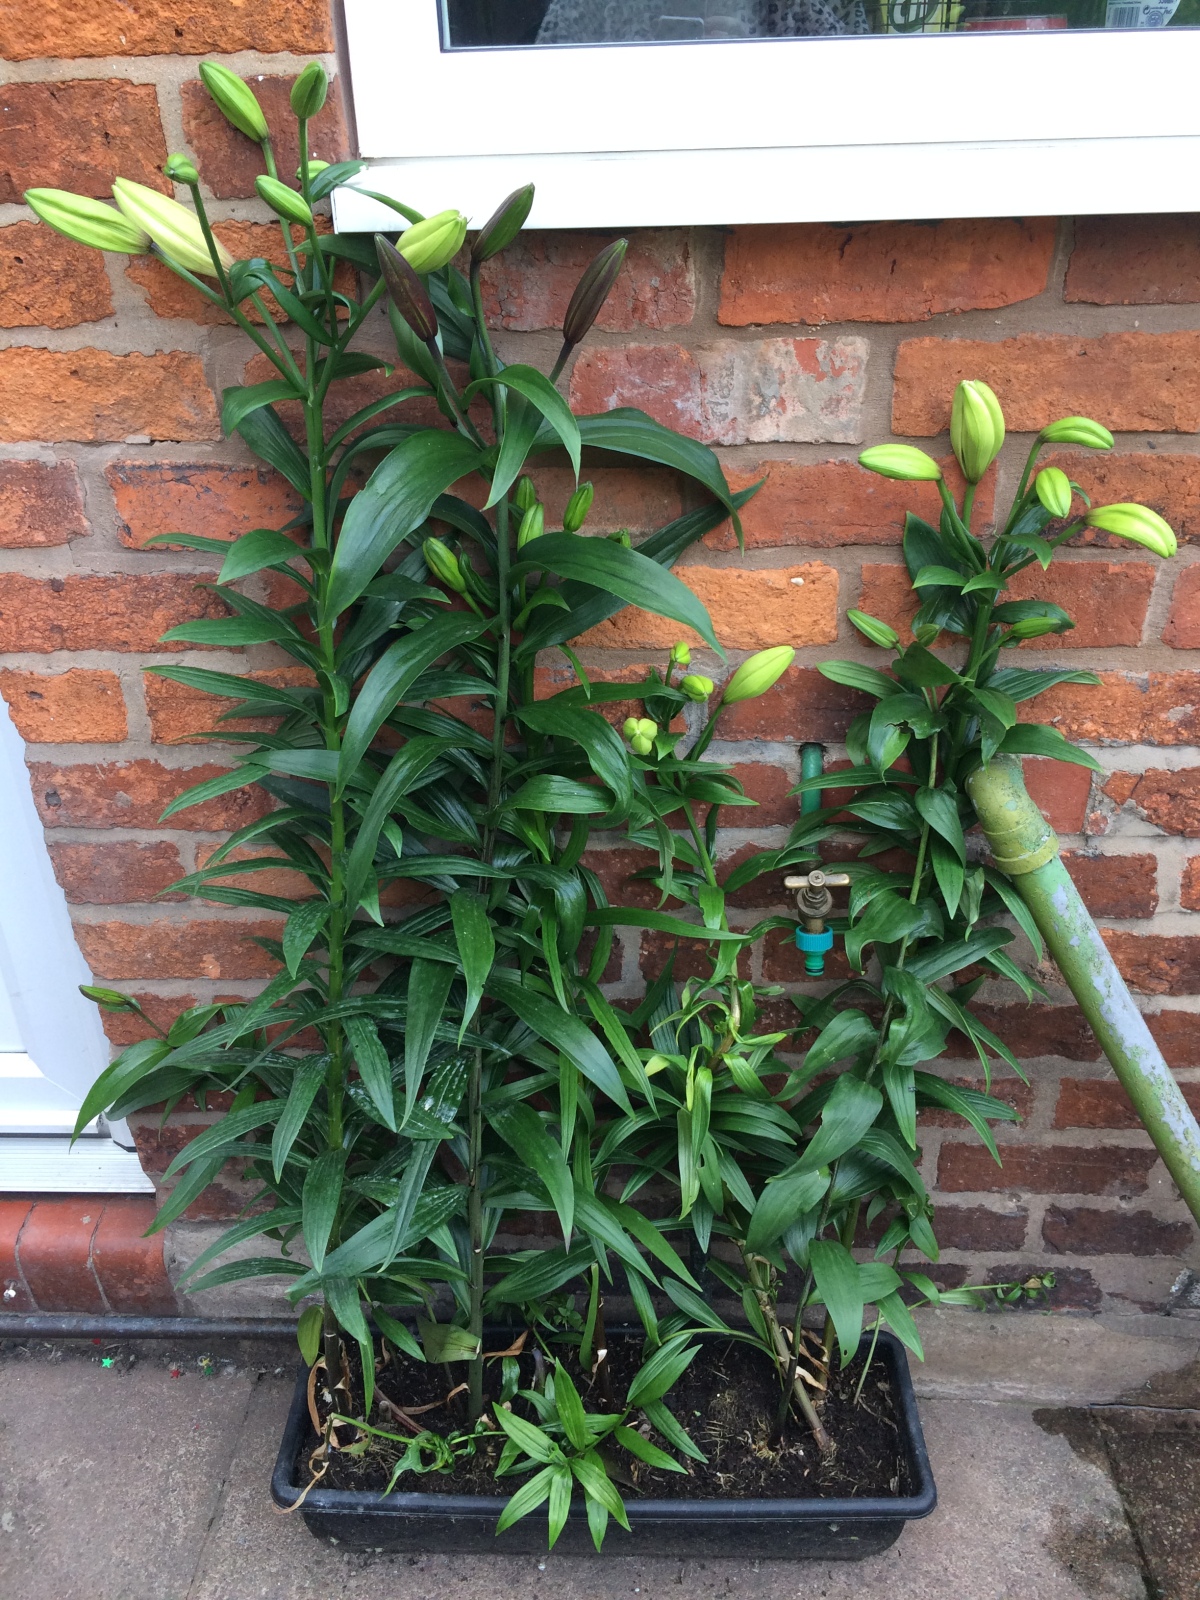
Well Summer is most definitely here in England! We are experiencing wonderful temperatures and the garden is loving it! As you can imagine the watering at the moment is a full time job, but it gives me a brilliant excuse to get out in between the plants. I wanted to share a quick post with you to show you a few of the plants that are fully embracing Summer!
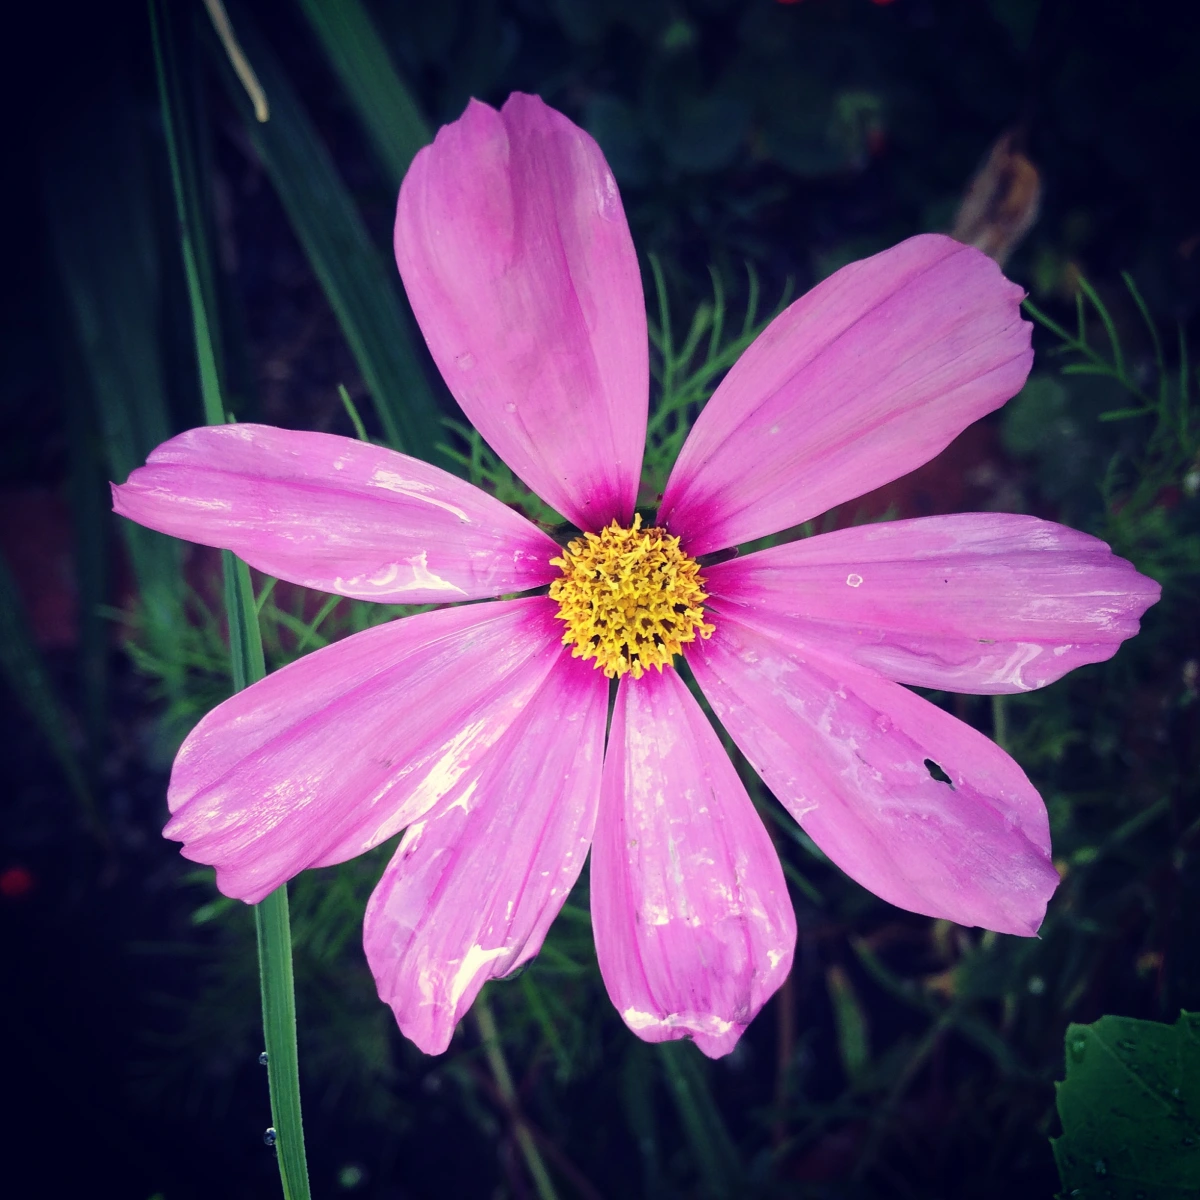
My first and favourite plants at the moment are the Lilies! They are slowly but surely opening up and I am so excited! Below is a picture of the first variety to bloom, which is called ‘Eyeliner’. As you can see the petal edges are beautifully half lined with a darker colour to resemble eyeliner. Nature really does amaze me as this Lily can definitely rock eyeliner better than me! I have to say there isn’t a smell with this variety however it’s beauty is gorgeous! I’ve got some other Lilies, which are slowly opening so I will share them with you once they are out.
The beautiful Lily ‘Eyeliner’
The next plant is a little way behind the Lilies but one that is going to be just as stunning! It is a gorgeous white Delphinium that my mum kindly gave me a root of! By the time I got it home it had split again into two so I planted it in the garden and hoped for the best! The below photo is of the bigger clump, but the smaller one is doing just as well! I’m so pleased with it and I can’t wait till it fully opens! I’ve had problems keeping Delphiniums in my garden (I’m on heavy clay so maybe it gets too cold and wet for them?), so I am very impressed with this one at the moment! I just hope it can brave the winter! I’d also love to take some of the spires inside but I think I might be pushing my luck a bit here!
The white Delphinium ready to burst into flower!
At this time of the year I had to include a Clematis and just couldn’t resist my gorgeous ‘Candy Stripe’ Clematis! I purchased this last year and it is even bigger and better this year! I have paired it with a beautiful baby pink rose, however at the end of this year they will unfortunately need splitting as they have outgrown each other! This Clematis flowers in abundance and always looks so summery!
Clematis ‘Candy Stripe’ basking in the sunshine
The last plant I wanted to share with you is this gorgeous rose, which I have featured on here already but one that is flowering it’s little heart out! This is a David Austin rose called ‘Tess of the d’Ubervilles’. It is a beautiful rose with such a rich and deep crimson colour, however the scent is also just as fantastic! In the evening after a warm day the scent of this rose lingers and it is gorgeous! After I bought this rose last year it went very sickly and I was worried about it, however after some TLC it seems to have come back fighting this year and is doing better then I could have ever expected! The amount of dead heading I have to do is proof to that!
David Austin Rose ‘Tess of the d’Ubervilles’
I hope you’ve enjoyed a little tour around my favourite plants and hopefully it’s a post I could maybe feature every couple of weeks? I’d love to hear about your favourite plants at the moment!
So it’s day two of the challenge from Tonya of Fourth Generation Farmgirl. If you haven’t already checked out her blog please do so! It is such a good blog and the photos are fantastic! Thank you for the challenge Tonya and hopefully you are enjoying my quotes as much as I enjoyed yours!
Here are the rules:
Thank the person who nominated you.
Post one quote a day for three days. The quotes can be yours or quotes from other people.
Nominate three bloggers per post.
Have fun!
Day two Quote
“Life isn’t about waiting for the storm to pass…It’s about learning to dance in the rain.” – Vivian Greene
This quote means such a lot to me and I actually have it printed on a little wooden plaque that I bought years ago just because the quote made me smile. I have been with my partner for 3 years now and love him unconditionally. It hasn’t been easy sailing as there is quite a big age gap between us and my family didn’t approve of our relationship. However when you love somebody, you just love somebody and nothing can come in between that even an age difference in my case.
Andy is a huge support in my life and not just my partner but my best friend. I hold dear the day I met him and although I have lost friends and even family just because an older man and a younger woman wanted to be together, I wouldn’t swap what we have for the world. I chose this quote as it got me through some hard times. When it seemed like everyone was against us and the storm was mighty, Andy turned to me and handed me the plaque and said ‘You have to learn how to dance in the rain”. To me that meant holding on to what I believed in and cherishing something that made me happy. We haven’t weathered the storm completely and I’m not sure we ever will, but there’s nothing like a spot of dancing!
Me and my partner Andy in Rome, Italy for my birthday in February 2015
I recently received a lovely comment on my About me page from Tonya of Fourth Generation Farmgirl who has kindly nominated me for the three day quote challenge. I am honored to have been asked and as I love quotes I have been itching to get started on this. Tonya posted 3 inspirational quotes, my favourite being the post where she nominated me, as I think it is a quote that can always give you strength. Please do check out Fourth Generation Farm girl’s blog as it features stunning photographs and well written blog posts that are so captivating and inspirational. Thank you for the challenge Tonya and for all your support – it means a lot!
Here are the rules:
Thank the person who nominated you.
Post one quote a day for three days. The quotes can be yours or quotes from other people.
Nominate three bloggers per post.
Have fun!
Day one Quote
” Beauty lies in the eye of the beholder” – Plato
‘Tess of the D’uberville’s’ David Austin rose bursting into flower
I love this quote as it is very true, you can look at one thing and think it is the most beautiful thing you have ever seen, however someone else can look at it and find it isn’t beautiful at all. Everyone has different tastes and that is a good thing!
OK, so we can safely say I have been MIA for some weeks now! You know when someone says ‘I don’t know where the days go?’ and you think ‘really?’. Well I really don’t know where the days have gone lately! I’ve had so much I’ve wanted to blog about and let you all know about, but the days have flown by and here I am nearly 3 weeks after my last blog post and finally sitting down and writing!
So I thought after a long stint away from my blog I’d open on a new feature post that I’m hopefully going to be running every month. The new post is going to be…drum roll please…Plant of the month! I know this might sound a bit strange but with so much wonder in the garden, sometimes it’s nice to highlight one plant that is working it’s socks off and give it a bit of extra praise. Also I thought it might be nice as I can feature a how to guide, which will feature just my own advice and what works for me, but just in case it’s a plant that someone has wanted to give a go and maybe not had the confidence to.
Peony Coral Sunset , which starts off a beautiful coral colour and changes to a light yellow to resemble the sunset!
For June’s plant of the month I really couldn’t pick anything else other than the Peony! June is a lovely month for gorgeous flowers as the days warm up and the conditions are to their liking, however the Peony is everywhere at the moment and rightly so! I was first drawn to Peonies at a young age, when in my mum’s garden hiding in between some shrubs and chives a beautiful burgundy, blousy flower emerged! I demanded my mum told me what this beautiful flower was and declared my love for it! Back then mum didn’t know which variety it was only that it was a Peony, but since then I have found out that it was Karl Rosenfold as I too now have the same Peony. Mum then went on to fill the garden with beautiful Peonies such as Sarah Bernhardt, Bowl of Beauty and Duchess de Nemours. I too have quite a few Peonies – Sarah Bernhardt, Coral Sunset and Karl Rosenfold however I would love some more with one of them being the Duchess de Nemours. The Duchess de Nemours is a gorgeous double white Peony with a heavenly scent to it – I cannot recommend it highly enough!
I have to hold my hand up and admit that in the past I have had my fair share of potential failures with Peonies! My Coral Sunset this year has flowered for the first time in two years, however my fingers are firmly crossed that a bright and blousy future lies ahead!
My Coral Sunset finally flowering after 2 years!
I’m sure everyone has heard you can’t plant Peonies too deep! That saying always rings in my ears, as it has always widely been discussed and one of those rules that shalt not be broken! It is however definitely correct and must be followed. I currently have a couple of Peonies in pots as they were struggling and needed some extra TLC. I planted them in shallow pots with their eyes (Peony roots) showing on top of the soil, I thought maybe this might be too shallow, however they have done better than I could ever have expected. Now I’m no master in how deep they should be planted so I consulted a couple of websites for some more precise information. Sarah Raven’s website features a wonderful page dedicated to planting and caring for Peonies. On the page Sarah states that Peony eyes shouldn’t be planted any deeper than 3-5 cm beneath the soil, the page features quite a few handy tips and also some great information on how to make your cut Peonies last longer. Please have a read of all the information via this link.
Karl Rosenfold flowering this Summer
OK, so we know that Peonies don’t like to be buried too deep but what about sun exposure? Peonies thrive in fun Sun to light shade. The previous tenants of our garden planted and left a beautiful Karl Rosenfold Peony in our front garden in nearly full shade. After hearing ‘You shouldn’t move Peonies’ I eventually plucked up the courage in Autumn last year and decided to move the Peony, I felt I did have much to lose as the Peony was really struggling! This Peony became one of my Peonies kept in a pot, and has doubled in size since it was moved 8 months ago! Hopefully I can be the proof that Peonies CAN be moved! This said they don’t like to be moved at just any time of the year! Peonies are best to be moved in Autumn when the soil is still warm and they can then spend the winter establishing the new growth for the next year.
I couldn’t resist cutting a few buds for the house!
Another handy tip that I do think is important with Peonies and one that Sarah Raven also mentions is to cut the foliage of your Peonies right back. I have quite a few well established Peonies, and in late Autumn I cut the foliage right back and dispose of the foliage. Not only does this tidy up the plant but it also helps to get rid of any nasty diseases lurking in the old foliage! I cannot recommend this tip enough, as Peony wilt can be a major problem with old growth. Something that I discovered in the first year of moving to our garden. The previous tenants not knowing, had not cut back the old Peony growth and the new foliage’s buds fell fowl of Peony Wilt. When we took over the garden the buds were nearly all lost, so I cut them off and disposed of them. Luckily this year they have been absolutely fine!
Just a few tips that I have picked up along the way but with a bit of love Peonies can enchant any garden and make exquisite cut flowers turning even a jam jar into something magical! Please do share any tips or photo’s of your Peonies in the comments section – I’d love to hear them all!
Peonies can even make an old jam jar look amazing!
I hope you have all enjoyed this ‘feature’, and please nominate any plants that you would like to see featured. They can be flowers or vegetables but they must be in their prime in the month they’re featured!
Our newly formed verge gardening group is busy transforming verges around the Guildford area. We started at Barb’s where she has killed off her couch in preparation for a native verge. We still have more work to do, covering with cardboard and mulch before we can begin planting.
Cristina has a long very narrow verge beside a fairly busy road and it was covered in weedy grasses. Six of us got to it with spades and in one hour we dug out all the weeds, raked over the ground, wetted it down and planted everlasting seed, ready for what should be a fantastic roadside display of colour in spring!
This weekend we’re moving onto Tash’s to get started there (Saturday 30th May, 2-4 pm, RSVP for address). It’s amazing how much easier it is when you have help!
Our small group of gardeners all have different plans for their verges…
Firstly I do apologise as this week I seem to have disappeared off the face of the earth! It was a Bank Holiday this weekend in the UK and I took full advantage of it by booking the Friday off as well! It was a bit of a struggle heading in to work on Tuesday!
We treated ourselves to a cheeky ice cream!
The weekend was lovely so I just thought I would share it with you! On the Friday I visited a local Garden nursery on the outskirts of Sandbach. My mum has been going there for a few years now and she has been promising to take me for some time, however as it is only open on the weekdays it is a bit of a problem with a full time job. So this Friday we made it there! I have to say I was after one specific thing (and a few other things – of course)! My mum has got a gorgeous creamy/slightly yellow Rhododendron, that she bought from the nursery that I fell in love with the moment I saw it!
I haven’t been to too many plant nurseries if I’m honest but the one’s I have been too have been wonderful! It is hard to find out about local nurseries as they are not as well signposted and as well-known as local garden centres, however that is one of the beauties of them! We arrived at the nursery to plants and polytunnels everywhere and as far as the eye could see, there were also well established trees, shrubs and hedging plants! I was like a kid in a sweet shop – literally! I was so excited and mesmerized by all the choice! Each section had something new to look at and there was just rows and rows of plants with even more in the Polytunnels!
The local Plant Nursery
My mum quickly ushered me over to the Rhododendrons in search of the allusive Rhodie like hers, there were plenty to choose from and what a healthy selection! I left my heart there for a Rhododendron in a beautiful cerise pink with frilly petals. However I had to compromise as I spotted a similar Rhododendron to the one I had been after and also a beautiful lilac coloured one which was lined with a pinky/purple colour! I cannot describe it’s beauty to do it justice, but I really couldn’t leave it there!
The beautiful cerise, frilled edge Rhododendron
I also picked out quite a few other plants (I don’t know where they are going to go!) and so did my mum. Our shopping list was as follows;
4 x Euphorbia (big, nice plants)
3 x Brunnera
1 x Heuchera (again nice, big plant)
2 x Wisteria (a couple of years old plant, not massive about 4 foot but nice and healthy and a perfect size for me)
1 x Bleeding heart (again nice big plant)
1 x Phormium (big plant)
1 x huge Rhododendron
1 x small Rhododendron
1 x Montana Clematis
4 x Geranium Astrantia in a gorgeous black/deep burgundy colour
All of this lot came to £66, which I thought was a bargain! My mum and I were in absolute shock! All the plants are lovely and healthy and well established! I can’t wait to go again a bit later on in the season to see what else they have. The one thing about this nursery is you need to know your plants! None of the plants come with labels as to the names or ‘care instructions’ (as I like to call them). So if you know a bit about them then you’re fine. Also none of the plants featured prices, but if you ask a member of staff they have a rough outline as to what the price will be. I definitely recommend getting yourself to your nearest plant nursery if you can find one. It’s a completely different experience and one that is for the plant lover!
The rest of the weekend was spent with my partner; gardening, walking, eating and searching! I’m a bit fan of Emma Bridgewater pottery and I also like old china and vintage pieces so my partner and I went to Dagfields on the outskirts of Nantwich to see if we could find any pieces. Dagfields is a series of buildings full to the brink of older items just waiting to be rummaged through to find some bargains. I found some great things there and some things I wished I’d picked up but I left (I may have to make a return visit)! It was lovely to just have a wander round and a nosey at all the things on offer – I love doing this and find it very therapeutic!
A cute idea found at Dagfields!
On Sunday we took our dogs Ce Ce and MiMi for a lovely walk up on the local hills – we all thoroughly enjoyed ourselves and the fresh air as we looked out over Cheshire. It’s so lovely up there and it really clears the mind – it’s one of our favourite places! We then called at a local pub for some lunch and finished the day relaxing in front of the tv – stuffed from a lovely meal! Monday was planting day as I had some seedlings ready to go in to the ground and the plants from the nursery to plant! The day flew by as I was busy in the garden and as always I was in my happy place! The garden really is coming along now so I will give you an update soon!
The view from the hills!
I hope you all had a lovely weekend! What plans have you got for the upcoming one?
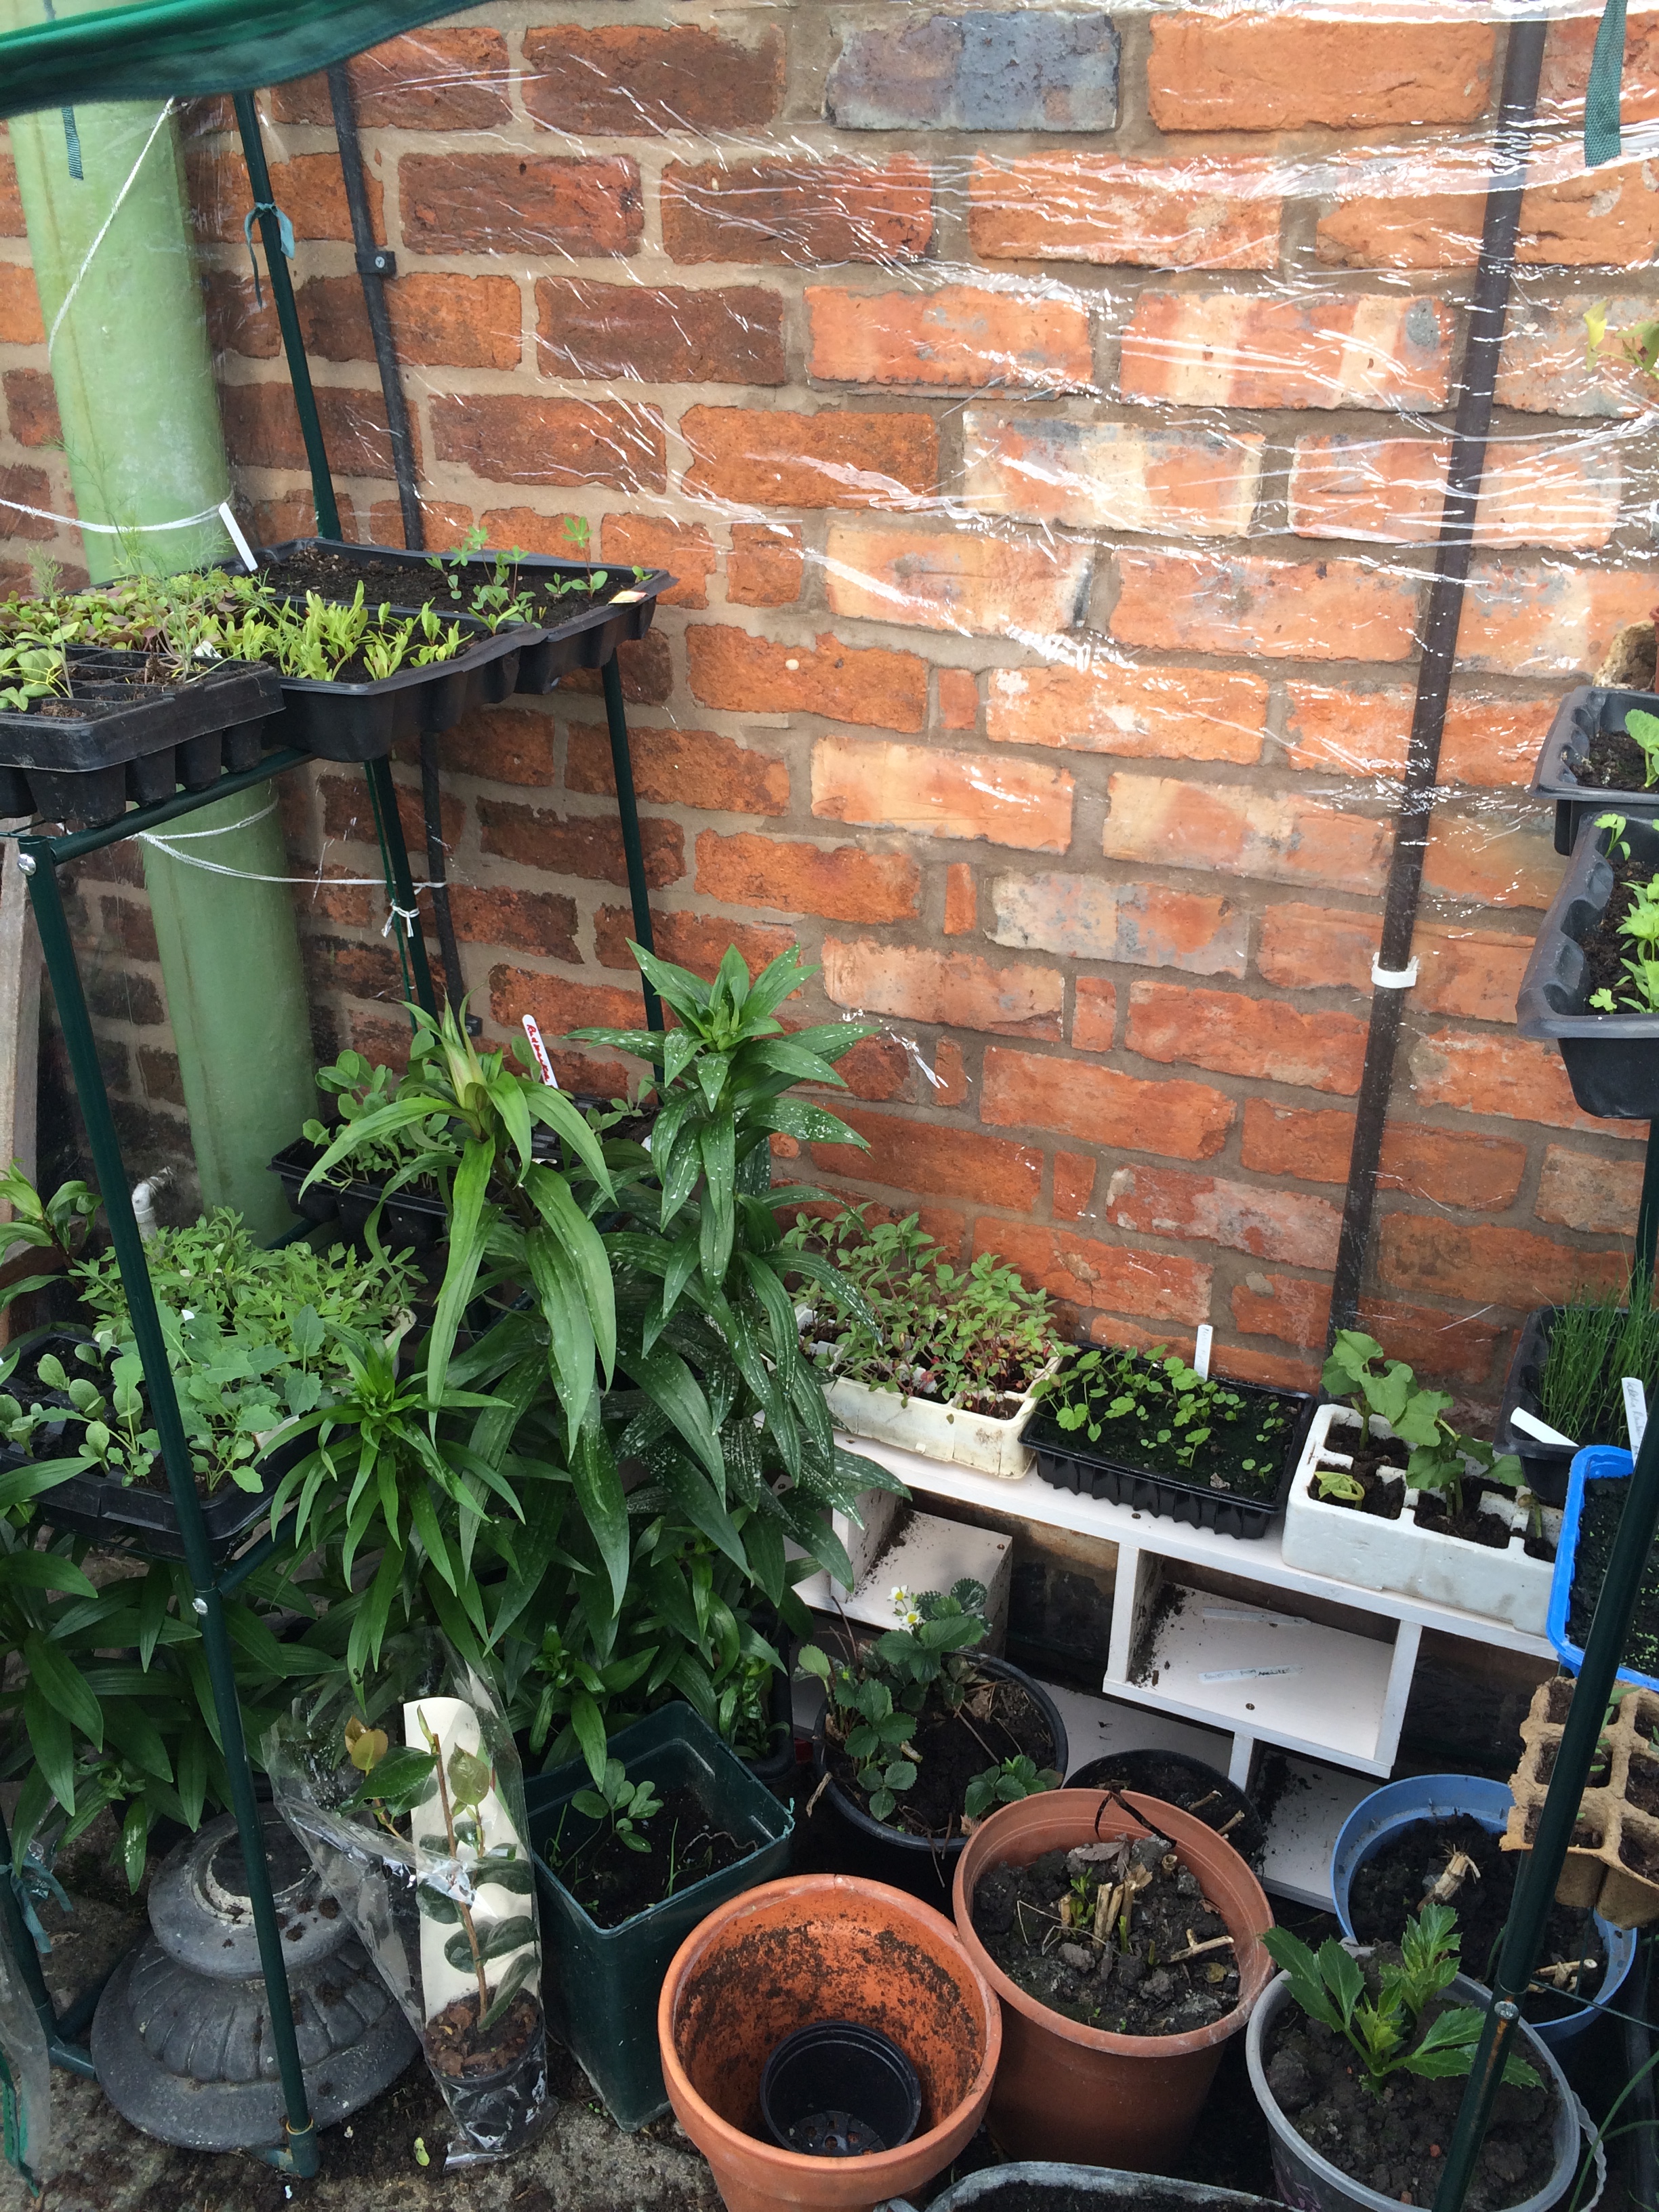
My little pop up greenhouse at the start of the growing season
Well the weather has been very mixed of late to say the least. Although we are now in May it doesn’t seem to have warmed up much in the UK and we are being attacked by high winds on a regular basis! If that wasn’t enough we are getting a mixture of heavy showers and sunshine! The garden seems to be loving it though as everything is growing rapidly – including the lawn! I’m desperate to get in the garden as I’m busily extending some of my borders to fit more plants in. I managed to extend one border on Sunday before the heavens opened banishing me inside! However I still have another border that I want to extend by a foot so I can put my vegetable’s in!
I’m sure I’m at the stage most gardeners are at – too many plants waiting to find their forever homes! At the moment my greenhouse is bursting at the seams with seedlings that are waiting to go out! It seems to be a daily routine now to check to see if any seedlings measure up in order to stand on their own two feet. I have to say it hasn’t helped an awful lot that my greenhouse is the pop up variety. Although in a sunny spot it doesn’t get the hottest as it has a plastic cover rather than glass, so everything is taking a little bit longer, but it’s doing well! I wanted to give you a little update as the seedlings have come a long way since my post of Sowing the seeds of summer. I even took some seedlings to a plant swap (ok the plant swap was with my mum – but she was very impressed)!
My greenhouse now – full to the brink!
I have planted a few seedlings out and I have quite a few hardening off, but the greenhouse is still full and I have some more seeds that I want to sow! The Cabbages, Swede and Cauliflower are all doing really well and are at a good size now – they are waiting (patiently) to go in to the veg border once it is created. The Swiss Chard seedlings as you can see from the below photo are romping away and already have their colour (I feel like a mum who is proud as punch)!
My Swiss Chard seedlings coming along nicely!
I also sowed some beetroot which is also doing great and once planted out will do really well, I’m hoping to sow some more Beetroot so I have some succession veg for when the first lot is all used up! I also sowed some Kale (my first year of doing so) and it is establishing in to nice little plants. I need to research Kale a bit more as I’m not sure yet where I am going to plant it! I also sowed some Borlotti Beans for the first time this year and after a slow start (I thought they were never going to germinate) the lovely bean shoots popped (or really cracked) through the soil to make an appearance!
The Borlotti Beans are finally taking off!
On the flower seedling front, I’ve had a bit of a mixed bunch! The Sweetpeas I’ve sown have germinated but I only have about 5 seedlings – which isn’t too bad! I have another packet so I’m hoping for a few more! I did sow some Aquilegia’s but only one seedling has germinated from them – and it doesn’t look the healthiest! It’s annoying as outside on our drive we have quite a few that have self seeded themselves, however I can’t grow them from seed! I also sowed some Angelica seeds as I love Angelica but they never took (I think the mouse who visited earlier had munched them all). That said I have had some good success’s such as Larkspur, Lupins, Malva, Calendula and Holyhock’s! So I can’t complain! I think maybe next year I need to look at what I sow and how I do it (maybe the greenhouse wasn’t warm enough for the flower seeds). I’m happy with what I’ve got so far and I can’t wait to plant some more! My partner is mesmerized with all the plants and keeps saying “Have you not got enough yet” I give him ‘the glance’ as if to say “don’t be silly”. You can never have too many plants!
My Malva seedlings coming on well – this is the first year of Malva in the garden!I’ve planted some of my Holyhock seedlings out and for a bit of protection I’ve put a plastic drinks cup over them as a mini cloche!The Larkspur seedlings getting their true leavesParsley and Basil seedlings doing well
How are you all getting on with your gardens? Have you got lots of seedlings waiting to go out too?
I am still in a bit of a bubble since RHS Malvern and I keep going over all the things I’ve seen in my head – as there was so much to see! There were some great ideas from Malvern that I wanted to share with you as I’m hoping to try and create them in my garden (fingers crossed). I am just at that stage now, where I am trying to work out in my head if they will work where I want to put them and how I’m actually going to do them.
I’ve been really interested in making an arch way out of natural materials to go over a small path (two paving slabs) so that I can trail my sweet peas and some beans over the arch and it will also give the garden some character in the winter months. Being in a rented property I wanted to create something that is easy to move and is not permanent, as much as I love the garden it is not technically mine. I wanted to use natural materials to make the archway as I wanted something that blended in to its environment and hopefully that in time would benefit the gardens wildlife.
Willow was featured in quite a lot of gardens!
I’ve been toying with the idea of using willow for the arch and RHS Malvern was full of different willow techniques – no archways unfortunately! However it confirmed my thoughts that it would be a good material to use! Instead there were willow path edgings, willow fences, willow supports/obelisks and willow baskets! It was willow-tastic!
Willow-tastic!
I was really taken with the willow edging as I have been looking at edging a few of my borders to neaten them up and also to stop my dogs walking through the borders (they don’t seem to realise that a plant wasn’t grown to be walked on – bless!). There were a few different types of edging that caught my eye and I’ve included the photo’s below, I’d love to know what you think!
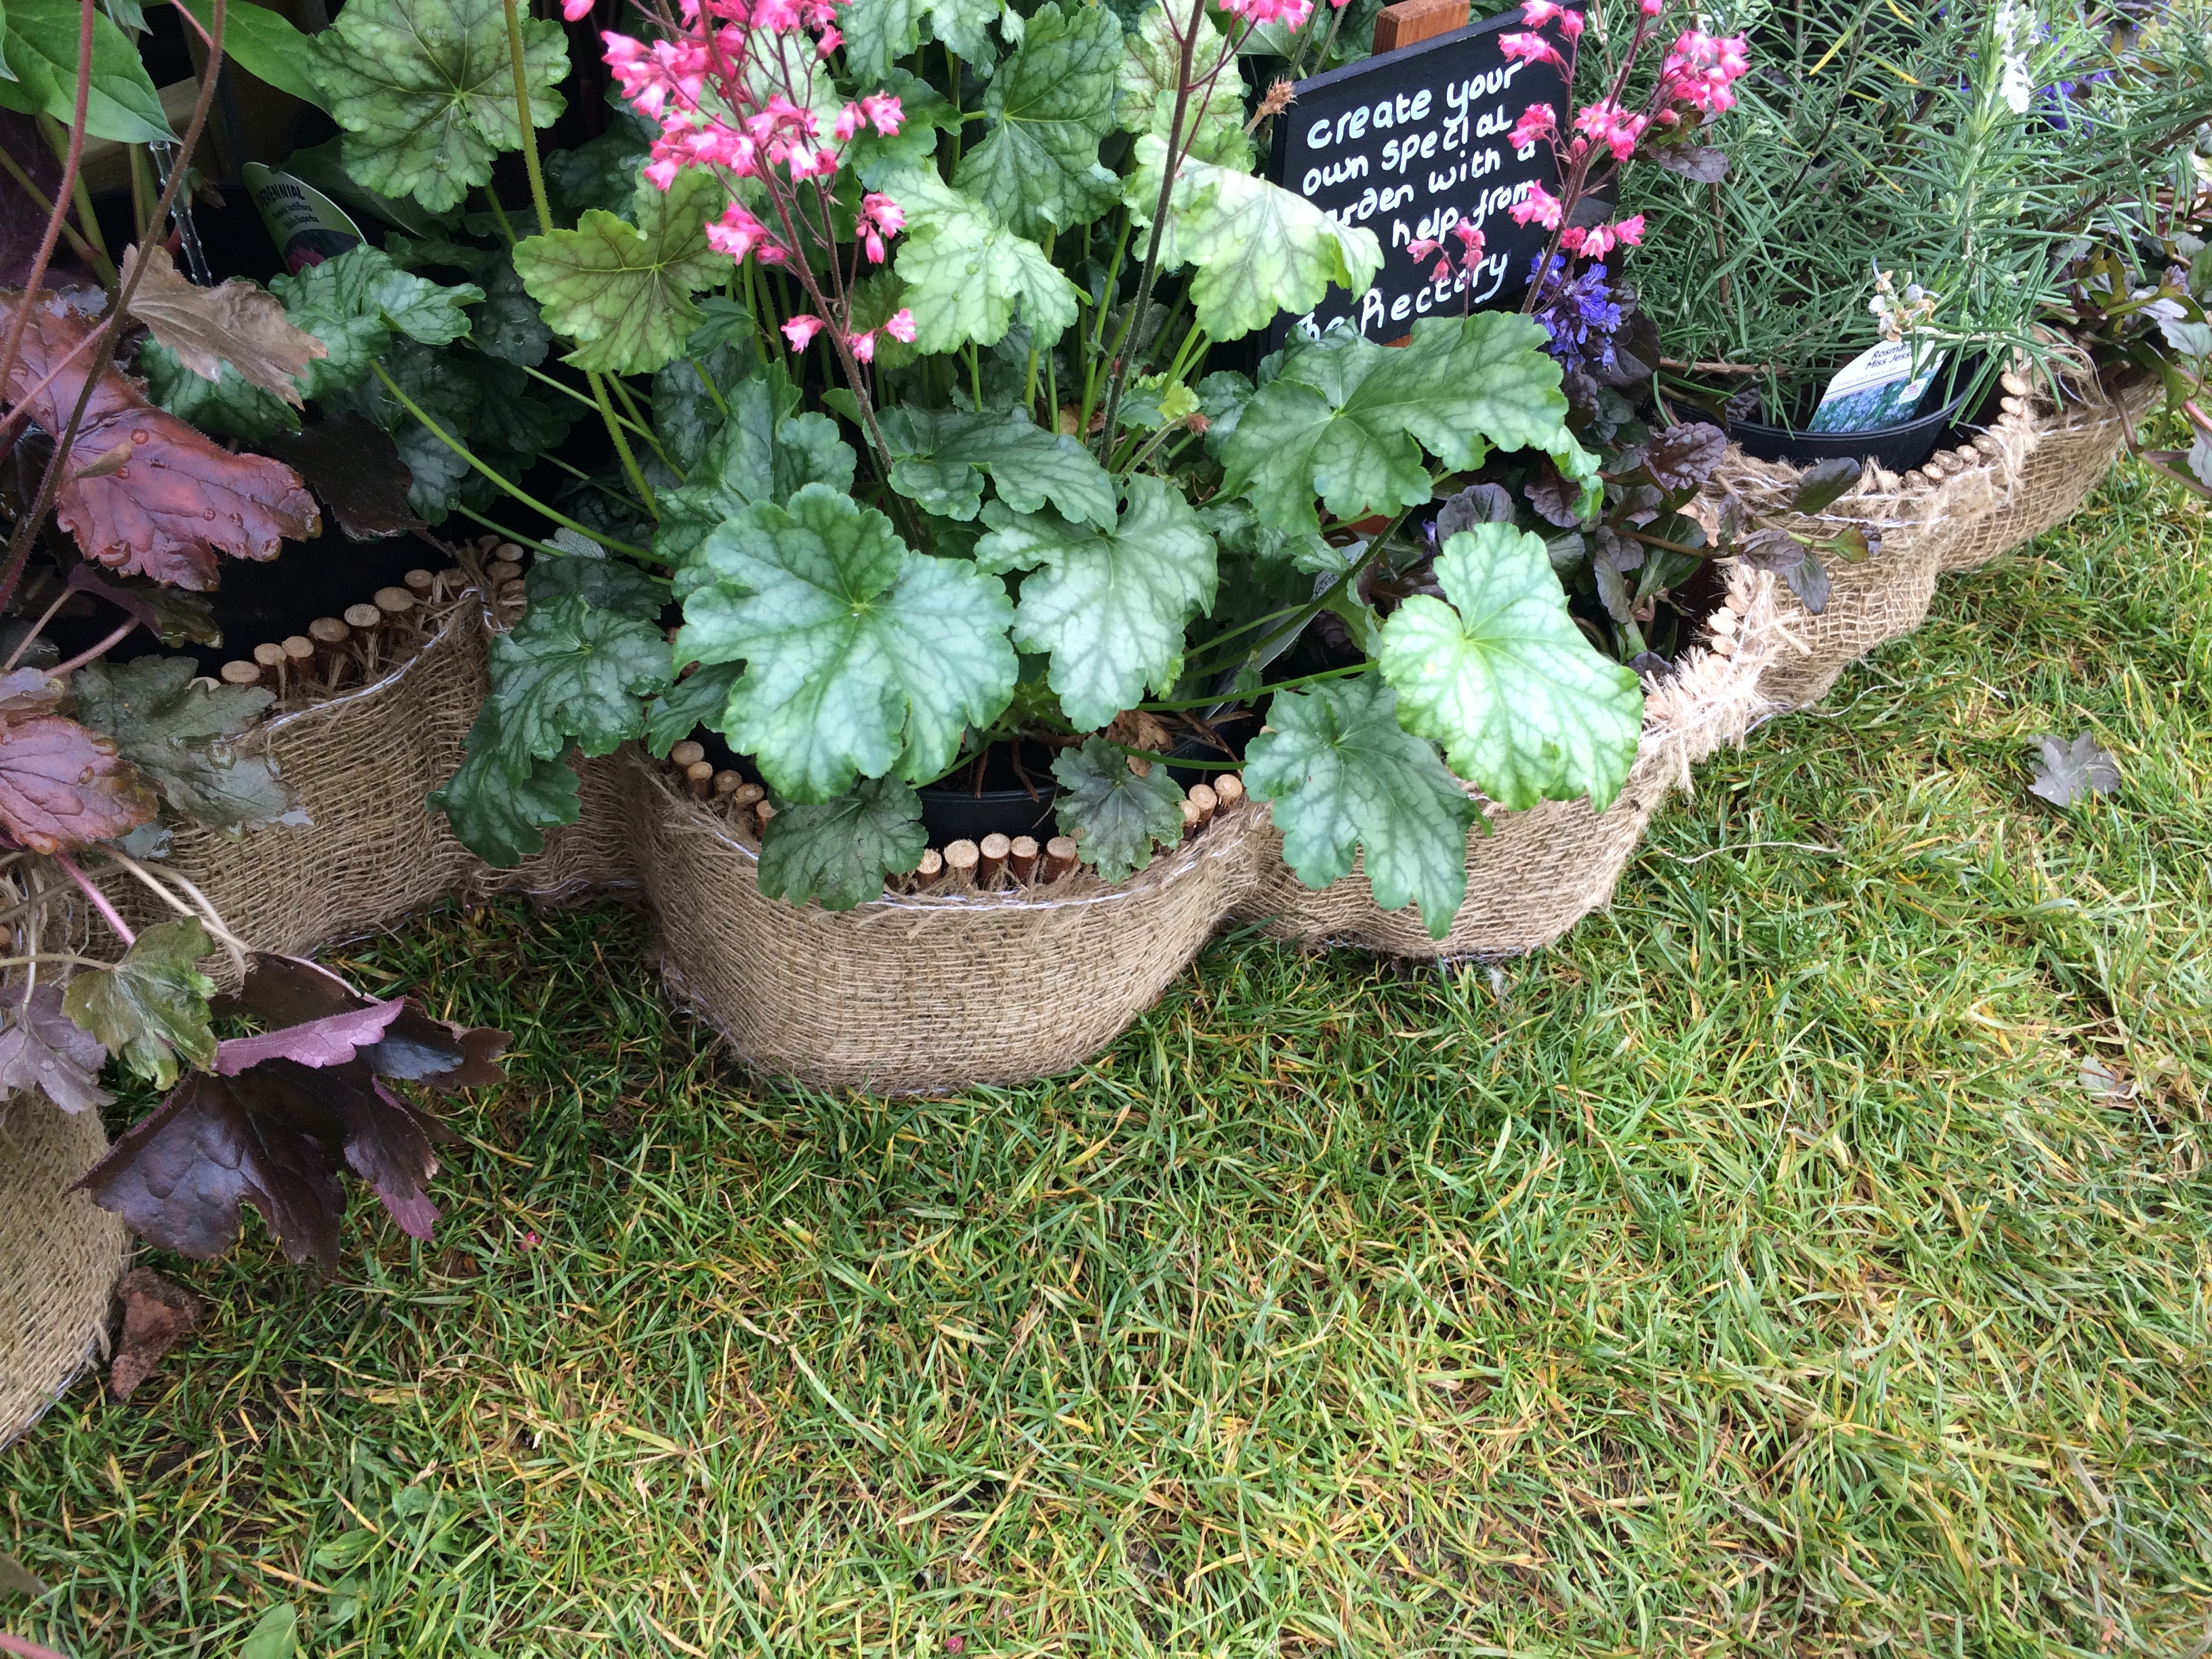
The first border edging that I came across was on a beautiful Plant nursery stand. They had created a miniature snippet of a garden to showcase the plants they had for sale. The miniature garden was gorgeous, with some lovely romantic planting full of peonies and an old bench with a tea set and a couple of flowery cushions – it was gorgeous and I would love the whole thing in my garden. The edging was made up of a succession of small twigs held together with wire. I have seen something similar in garden centres and it comes in a roll. It’s not massively expensive so I thought this was a good idea. The edging was then covered with hessian to complete the look. This style was very rustic and lovely, I just don’t know how practical the hessian will be!
The first edging design I liked – it suited the garden so much!
The next edging was a lot simpler, cheaper and more natural, however I only just noticed it! The edging was around one of the smaller gardens, however due to its position around the garden (it was put in mid lawn) and the amount of people viewing the garden I nearly missed it. This edging was simply a twig of willow arched into the ground and repeated to fence the area. I thought it was a god idea as you could still see the border through the fence and I could make it high enough to persuade my doggies to take a different route without blocking the border off to light etc! I also hoped if the willow rooted itself I might be able to get a living willow edge, however I am starting this a bit late in the year so I might have to create the living one next year!
Sorry, not the best photo but I couldn’t get any closer!
The last one and the most labour intensive one was featured on the winning local school’s garden. As you can see from the photo below they did an excellent job of their garden! I loved the willow fence which looked like it was keeping the garden together. I did think about creating a lower one in my garden, but then I wondered if it would be a bit too elaborate?
An amazing willow fence!
I’d love to know what you all think to the ideas above? Have any of you tried to work with willow?